Friday, February 5, 2010

How to make ruffles: Part 1


There are two main types of ruffles: straight ruffles and circular ruffles. Today I will teach you how to make straight ruffles. Its quite simple, but I will also show you variations, and examples of how gathered ruffles can be used to create different effects.


Starting off with the basics:

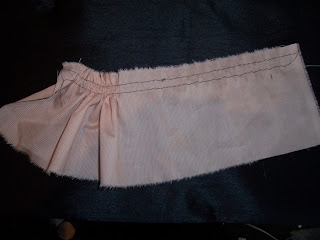
1)tear or cut strips of fabric in the desired width. I am using 3 " wide strips in this example. For length, you will want the strip to be 1.5-2 times longer than the desired finished length of the ruffle. (ex. if you need a ruffle that is 12" long, you will need to start with a strip that is 18-24 inches long). the more length you add, the more tightly gathered ruffle you can create.


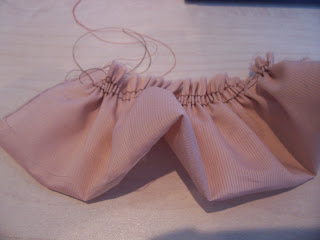
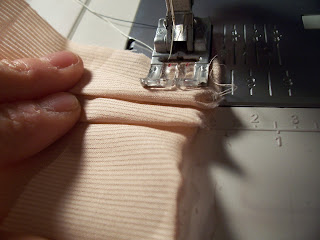
Machine baste two rows about 1/4 inch apart. (basting would be the greatest stitch length your machine can do).


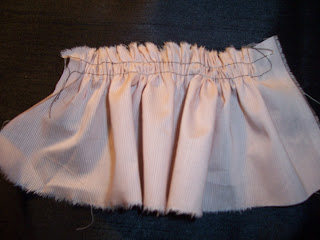
Pull the threads on the underside of strip in order to gather up the fabric.


Continue to pull and spread out the gathers to create an even look and obtain the desired length.


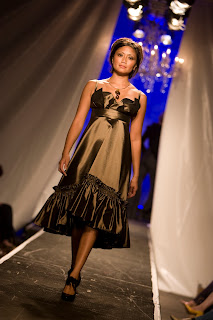
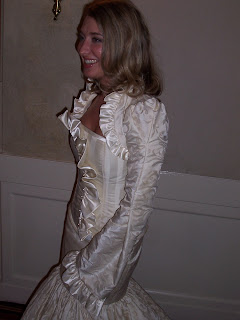
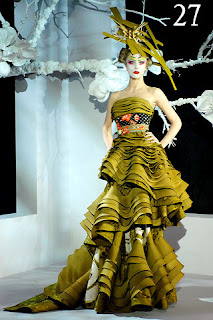
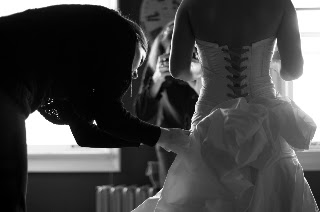
The above method was used to make the ruffle at the bottom of this dress:


a couple of tips:


1) if you find that the bottom strings do not want to pull/ gather easily, try adjusting your tension so that the bottom thread is easier to pull.


2) cutting the strips with the grainline gives you a different type of ruffle than cutting the strips against the grainline. As a general rule of thumb, cutting your strips with the grainline will give you a more organized and uniform ruffle, where as cutting the strips against the grain will give you a bouncier looking ruffle.... correct me if I mixed that up , Barb :) Different fabrics will give you different results so experiment.


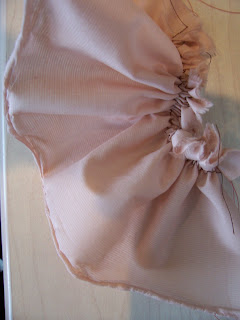
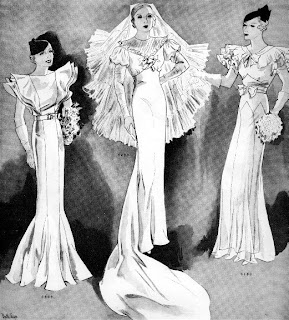
Example of ruffle cut against grain:


3)If you are working with a heavier fabric, you may find that your threads break when you are trying to pull them to gather. Try 3 rows of stitches. If that doesnt work, try a heavier weight thread. And if that doesnt work, you can zig zag stitch over a very narrow piece of cording or thin ribbon, and pull on the cording to gather up the fabric.


Straight ruffle variations include:


sewing the gathering stitch in the middle:


Example of how I use this variation:


Using a folded strip in order to get a softer edge:

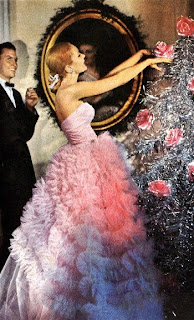
This type of ruffle works well when you are making a garment in which you will see both sides of the ruffle. Example:


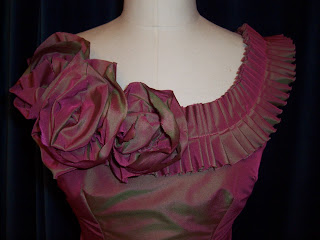
Pleating the fabric:


Pleated ruffle used on a capelet:


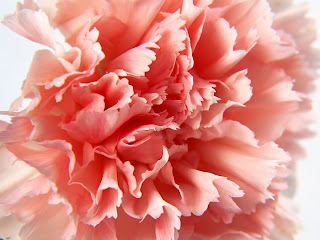
And finally, if you take the straight ruffle and wrap it around itself, you can create flowers!


Next time, I will show you how to make circular ruffles...

Wednesday, February 3, 2010

Ode to my best friend: The Ruffle (Part 1)


Ruffles: can't live without them... can't live without them. Or so at least I think. For all those people who despise ruffles, look away; this entry is not for you.


Why are ruffles my best friend you ask? Where to start...


Ruffles can be: dainty. feminine. soft and innocent. playful. flirty. structured and sculptural. sexy. scandalous? So versatile- you can find ruffles on everything from a first communion dress to your most provocative undergarments...


Looking at the ruffle itself, I enjoy the negative spaces and shapes created through the gathering of fabric. Ruffles can add volume in areas that seem empty, they can transform shapes and silhouettes. They can make a dress or blouse look modern or vintage, old or young. Oh how I love ruffles!


If you are anything like me and find that your body measurements are disproportionate ( for me, I am 2 sizes smaller on top than on bottom) you often need to add volume to the smaller areas to even yourself out. You may notice that a lot of what i make has ruffles and details on the top with a simpler bottom. That is because this is what is most flattering for me.
If you find that you are more triangular in shape with wider shoulders and smaller hips, you may look better with ruffles on the bottom half...


In my next blog, I will show you how to make different types of ruffles....


Monday, February 1, 2010

My last custom project for 2009 was a wedding party; the wedding dress itself and 6 bridesmaid dresses. I have known Kim (the bride) for years, in fact she modeled in my very first fashion show in 2003. Half anxious, half excited, I decided last minute to drive to Fond Du Lac, WI to help Kim and her bridesmaids get dressed, and to make sure everything looked perfect for her special day.

You would think that I would be able to relax once the dresses are done and out of my studio, but for me, the nervousness does not actually pass until the event the dresses are made for is over. And on the other hand, it's very rewarding to actually see your creations in the special moment they are made for. Being able to experience such a happy affair makes all the hard work and extra hours worth it :)


I asked my friend Amelia to tag along and photograph the process. Amelia is new to photography...I believe she has only been shooting for 6 months or so and has no formal training, but there is a softness and sweetness in her photographs that I really enjoy. I have never worked with her before, and in order to make it as low pressure as possible, I asked her to shoot whatever comes naturally for her....


To see more of Amelia's work, please visit http://www.ameliacoffaro.com/

I would also like to mention Kim's wedding photographer Libby who has some beautiful images up on her website: http://www.studio32.photographyblog.com/ . (the couple is Kimberly and BJ, blog post Jan 9).